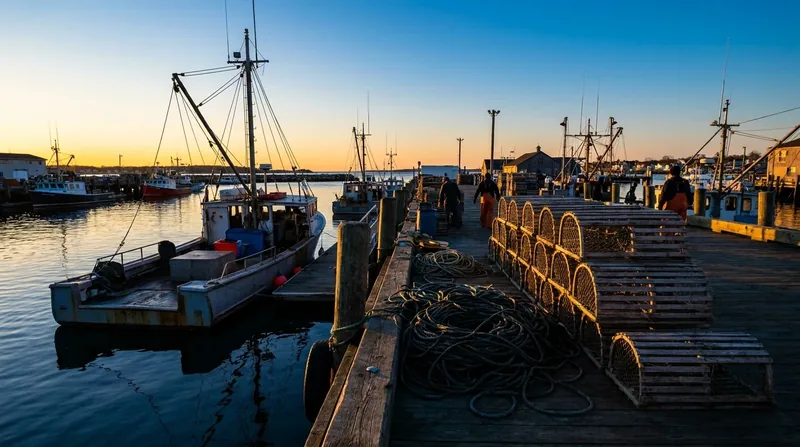
How to Start an Oyster Farm in Massachusetts
How to Start an Oyster Farm in Massachusetts
Oyster farming in Massachusetts offers both environmental and economic benefits, transforming underutilized waterways into productive aquaculture operations. This guide walks you through the practical steps, regulatory requirements, and essential considerations for launching a successful oyster farm in the Commonwealth.
Before You Start: The Reality Check
Oyster farming is capital-intensive, weather-dependent, and heavily regulated. Unlike land-based agriculture, you cannot simply lease water and begin operations. Massachusetts requires multiple permits, environmental approvals, and proof of adequate site conditions. The timeline from initial planning to first harvest typically spans 18 to 36 months. Success depends on choosing the right location, understanding the regulatory landscape, and having adequate startup capital.
This guide is informational only and does not constitute legal or regulatory advice. Before investing in an oyster farm, consult with a qualified attorney familiar with Massachusetts aquaculture law, an environmental consultant, and the Massachusetts Division of Marine Fisheries.
Step 1: Determine Your Site and Water Body
Your success or failure is determined largely by site selection. Oysters require specific conditions:
- Water quality: Salinity between 15 and 30 parts per thousand (ppt); stable temperatures; low pollution; good water circulation.
- Existing oyster presence: Natural or historical oyster beds indicate viable habitat.
- Substrate: Hard bottom or appropriate cultch (oyster shell) placement areas.
- Access: Reliable boat access for daily or weekly operations.
- Ownership or lease: You must own or have a written lease for the waterfront land and secure water rights.
Contact the Massachusetts Division of Marine Fisheries (DMF) to determine if your proposed site is in a shellfish growing area approved for aquaculture. Many coastal towns have designated areas; some areas are closed due to pollution, bacterial contamination, or other concerns.
Step 2: Obtain Required Permits and Licenses
Massachusetts requires several permits before you can legally farm oysters. Requirements and fees vary; contact the agencies below directly for current costs, processing times, and forms.
Massachusetts Division of Marine Fisheries (DMF) Aquaculture License
The primary permit for oyster farming in Massachusetts is the Aquaculture License, issued by the DMF. You must submit:
- A completed aquaculture license application.
- Proof of ownership or a lease agreement for the land and water use rights.
- A site plan showing the exact location of gear, upland facilities, and environmental buffers.
- A water quality assessment or baseline data (often prepared by a consultant).
- Evidence that the site is in an approved shellfish growing area.
- Your Shellfish Harvesting License.
The DMF typically processes aquaculture licenses within 60 to 90 days after a complete application is submitted, though this can vary. For current fees and processing times, contact the Massachusetts Division of Marine Fisheries at (617) 626-1500 or visit their website.
Shellfish Harvesting License
All oyster farmers must hold a Massachusetts Shellfish Harvesting License. This is obtained from your town's board of selectmen or harbormaster and proves you are authorized to harvest shellfish from approved areas. Fees vary by municipality (typically $50 to $200 annually). Some towns require residency or a commercial fishing background; confirm your town's specific requirements.
Environmental Review and Coastal Zone Management
Depending on your exact location and the scale of your operation, you may need:
- Massachusetts Environmental Policy Act (MEPA) review: Required for certain aquaculture projects; determines if an Environmental Assessment Form or full Environmental Impact Statement is needed.
- Local permits: Harbormaster approval, conservation commission approval (if wetlands are involved), or zoning board approval.
- Army Corps of Engineers permits: If structures (docks, moorings) are placed in federal waters or jurisdictional wetlands.
- Coast Guard notification: For certain installations in navigable waters.
Work with an environmental consultant or aquaculture lawyer to identify which permits apply to your specific site. This step often accounts for 6 to 12 months of your pre-operation timeline.
Step 3: Secure Land and Water Rights
You must have legal authority to use both the upland and water areas of your farm:
- Upland property: Own or lease waterfront land for equipment storage, gear cleaning, packing, and potential office space. Minimum recommended: 1,000 to 2,000 square feet.
- Water lease or water rights: Many farms lease water from municipalities, land trusts, or private waterfront owners. Terms vary widely. Negotiate carefully, including renewal options and termination clauses.
- Written agreements: All leases and rights must be in writing and submitted with your DMF aquaculture license application.
Step 4: Obtain Liability Insurance and Bonds
Before purchasing equipment or beginning operations, secure:
- General liability insurance: Covers personal injury and property damage claims. Most insurers require $1 to $2 million in coverage for aquaculture operations.
- Product liability insurance: Covers harm from contaminated shellfish.
- Workers' compensation insurance: Required if you hire employees.
Some towns may require a surety bond to cover cleanup costs if your farm is abandoned. Budget $2,000 to $5,000 for initial insurance and bonding.
Step 5: Gather Equipment and Materials
Oyster farming equipment falls into several categories. Costs vary widely depending on scale and supplier:
Water-Based Equipment
- Oyster bags or cages: Mesh bags ($3 to $8 per bag) or rigid cages ($20 to $50 each) that hold cultch and juvenile oysters. A typical farm uses 1,000 to 5,000 bags.
- Cultch (oyster shell): Crushed oyster shell on which spat settle. Cost: $200 to $400 per ton; a small farm may need 5 to 20 tons initially.
- Spat or seed oysters: Hatchery-produced or wild-caught juvenile oysters. Hatchery spat: $50 to $150 per 1,000 individuals.
- Moorings and anchors: Floating bags must be anchored. Budget $50 to $150 per mooring.
- Floats and buoys: Marking your gear for boat traffic. Cost: $500 to $2,000.
Upland Equipment
- Boat or skiff: A 16 to 20-foot boat for accessing your site. Used boats: $5,000 to $20,000.
- Power washer: For cleaning gear and cultch. Cost: $500 to $2,000.
- Work tables, bins, and storage: For sorting, grading, and packing. Budget: $2,000 to $5,000.
- Water quality kit: Thermometer, salinity meter, and monitoring tools. Cost: $200 to $1,000.
- Weighing scale and packing materials: For harvest and sales. Budget: $500 to $1,500.
A small startup farm (0.5 to 2 acres of water) typically requires $30,000 to $100,000 in equipment and materials before the first oyster is harvested.
Step 6: Source Oyster Spat and Cultch
Decide whether to:
- Catch wild spat: Deploy cultch in spring to collect naturally settling oyster larvae. This is free but unpredictable.
- Purchase hatchery spat: Buy disease-tested, predictable juvenile oysters from hatcheries. More reliable but costs $500 to $2,000 per harvest cycle.
- Source cultch locally: Contact other oyster farms or shucking houses for oyster shell. Lower cost than purchased cultch.
Time your spat acquisition for spring (April to June) when water temperatures rise and natural settlement is most likely.
Step 7: Deploy Gear and Begin Cultivation
Once permits are approved and equipment is ready, deploy your farm in stages:
- Inspect your site: Confirm water clarity, check for predators (crabs, starfish), and verify mooring locations are safe.
- Deploy cultch and moorings: Place oyster bags or cages on the bottom or suspend from floats. Secure all moorings and mark with buoys.
- Add spat or seed: Place oyster larvae onto cultch carefully to avoid damage.
- Monitor and record: Log water temperature, salinity, and visibility daily or weekly. Check bags for biofouling and predators.
- Maintain your gear: Clean bags and cultch every 2 to 4 weeks to prevent algae and heavy biofouling.
- Cull and grade: As oysters grow (at 6 to 12 weeks), separate them into size classes to reduce crowding.
Step 8: Manage Growth and Prepare for Harvest
Oyster growth rates depend on water temperature, food availability (phytoplankton), and stocking density. In Massachusetts waters, oysters typically reach market size (3 inches) in 18 to 30 months.
Manage your farm by:
- Reducing density: As oysters grow, spread them across more bags to avoid overcrowding.
- Rotating bags: Move bags to different water depths to optimize food and oxygen access.
- Documenting growth: Measure oyster size monthly to predict harvest dates.
- Watching for disease: Monitor for dead or diseased oysters and remove them promptly.
Step 9: Comply with Food Safety and Harvesting Regulations
Before selling oysters, you must comply with Massachusetts food safety rules:
- Hazard Analysis and Critical Control Points (HACCP) plan: Document your farming, storage, handling, and traceability procedures.
- Growing area classification: Ensure your harvest area is classified as Approved or Conditionally Approved for shellfish harvest.
- Testing and depuration: Some areas require oysters to be depurated before sale.
- Harvest records: Keep detailed records of harvest dates, locations, quantities, and sales destinations.
- Labeling: Your oysters must include harvest location, date, and producer information.
Violations of food safety rules can result in closing your farm, destroying inventory, and facing substantial fines.
Step 10: Develop Sales Channels
Begin planning sales before harvest:
- Wholesale buyers: Restaurants, seafood markets, and distributors offer volume purchases but typically demand lower prices.
- Retail direct: Farmers markets and online sales command higher prices but require more customer interaction.
- Oyster bars and events: Host oyster roasts or partner with local businesses.
- Certification and branding: Emphasize local, sustainable farming in your marketing.
Materials and Equipment Summary
| Item | Typical Cost Range | Notes |
|---|---|---|
| Aquaculture license (DMF, annual) | Verify with DMF | Contact (617) 626-1500 for current fees |
| Shellfish harvesting license (town, annual) | $50 to $200 | Varies by municipality |
| Environmental permits and consultants | $2,000 to $10,000 | Depends on site complexity |
| Oyster bags/cages (per unit) | $3 to $50 | For 1,000 to 5,000 units |
| Cultch (shell, per ton) | $200 to $400 | 5 to 20 tons for startup |
| Spat/seed oysters | $50 to $150 per 1,000 | Hatchery-dependent pricing |
| Boat | $5,000 to $80,000 | Used or new; essential for daily operations |
| Insurance and bonding | $2,000 to $5,000 | Annual or multi-year policies |
Common Mistakes to Avoid
- Starting without permits: Operating without an active aquaculture license is illegal. The DMF can seize your gear and fine you.
- Choosing a poor site: Low salinity, high pollution, or unstable water quality leads to slow growth or total crop failure.
- Overcrowding bags: Packing too many oysters into limited space reduces growth rates and increases disease risk.
- Neglecting water quality monitoring: Tracking salinity, temperature, and transparency helps you respond to problems early.
- Poor record-keeping: Failing to document your practices opens you to regulatory violations.
- Underestimating startup costs: Most new oyster farmers spend 20 to 30 percent more than budgeted.
- Ignoring predators and biofouling: Crabs, starfish, and heavy algae growth destroy crop if not managed. Weekly maintenance is essential.
- Marketing too late: Begin building relationships with buyers 6 months before your first harvest.
Expected Timeline and Results
A realistic timeline from concept to first harvest is 24 to 36 months:
- Months 1 to 6: Site selection, initial consultations, environmental assessments, and permit applications.
- Months 6 to 12: Permit approval and environmental review (can extend to month 18 in complex cases).
- Months 12 to 15: Equipment purchase, mooring installation, and spat deployment.
- Months 15 to 30: Growing period; monitoring and maintenance.
- Months 30+: Harvest and sales.
A well-managed small farm (0.5 to 2 acres) in good growing conditions may yield 20 to 50 pounds of market-size oysters per acre per year. Production varies significantly based on water quality, seeding density, and management practices. Profitability typically arrives in year three or later.
Key Massachusetts Contacts and Resources
- Massachusetts Division of Marine Fisheries: (617) 626-1500 for aquaculture information, permit forms, and growing area maps.
- Local harbormaster: Contact your town's harbormaster for water access, mooring, and local permit requirements.
- Massachusetts Aquaculture Association: Peer support and technical guidance from other oyster farmers.
- University of Massachusetts Dartmouth: Research and extension services related to shellfish aquaculture.
- NOAA Fisheries Northeast Region: Technical assistance on sustainable aquaculture practices.
Disclaimer
This article provides informational guidance only and does not constitute legal, financial, tax, or regulatory advice. Oyster farming in Massachusetts is subject to numerous federal, state, and local regulations that change over time. Before investing in an oyster farm, consult with a qualified attorney familiar with Massachusetts aquaculture law, an environmental consultant, and the Massachusetts Division of Marine Fisheries. Verify all current fees, permit requirements, and timelines directly with the relevant agencies. The costs, timeline, and regulatory requirements described above are approximations based on typical operations and may not apply to your specific situation.
Keep exploring: related Massachusetts guides
- How to Start a Farm Business in Massachusetts
- How to Start a Commercial Fishing Business in Massachusetts
- How to Start a Dog Daycare or Boarding Business in Massachusetts
- How to Start an LLC in Massachusetts
- Massachusetts Business License
- How Much Does It Cost to Start a Business in Massachusetts
- All Massachusetts business types
- Every Massachusetts guide in one place